
Keeping it Original
March 30, 2013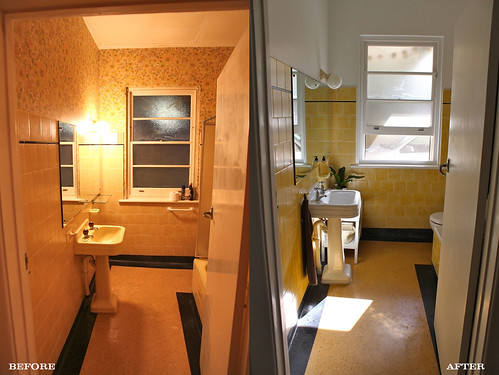 |
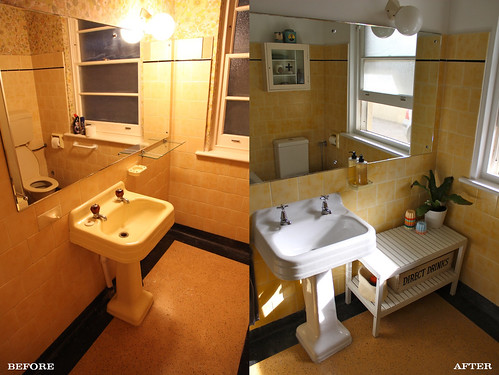
| We kept the original light fitting. The walls look so much cleaner with the wallpaper removed. |
When we bought our 1950s home, I was so pleased to find that the original bathroom was still intact. I love 1950s pastel bathrooms, and even though I would have preferred 'mint green', yellow was much better than pink! (I am simply not a pink girl!)
So considering the original tiles, pedestal basin, big bath and terrazzo floor were still in great condition, it was an obvious decision to retain all of these features. The classic thing, all the elements that needed replacing were the 1970's updates... toilet, taps (yuk), shower screen and the tired old 70s wallpaper.
 |
| Love love love the original floor! |
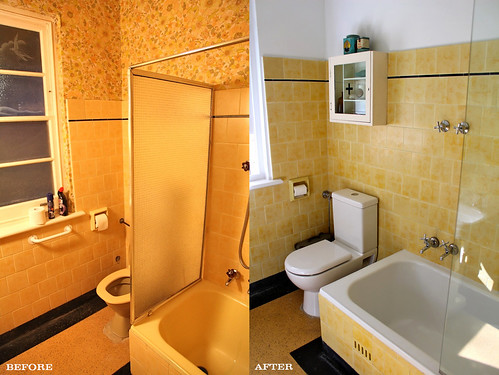 |
| Ahhhhh, a nice new toilet that doesn't leak! |
Where the original 1950s toilet was positioned there was an area of concrete exposed at the base of the toilet. I hunted around for a toilet that had the deepest base and this was the best I could come up with. A bit of the concrete can still be seen, but hey, it all helps to add character!
 |
| The original shower configuration simply did not work for us. |
Removing the 70s shower screen made the world of difference to this space. The original shower configuration was quite odd, with the shower head up one end of the bath and facing outwards there wasn't a lot of room to wash. The other end of the bath was kind of a void, so we decided to have the shower head shifted around to the other end making much better use of the space! A simple glass screen mounted to the wall above the bath finished it all off.
 |
| Cute original feature window etching, seagulls and waves. |
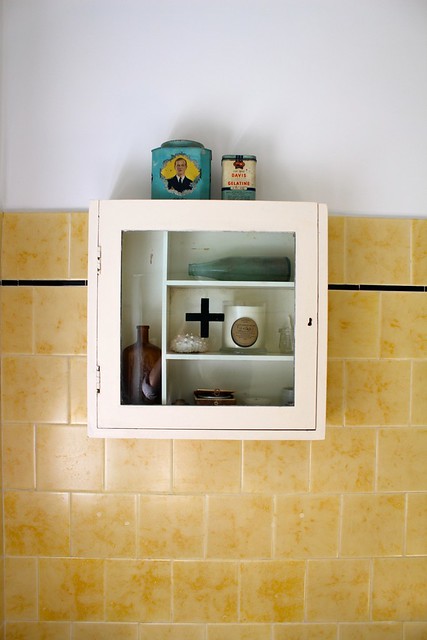 |
| Bathroom Cabinet from My Modern Nest |
We had quite a few hand rails to remove that left holes in the tiles (they were put up for the previous owner - an elderly gentleman). I was hoping I would find some matching tiles from a salvage yard to replace them, but no joy. So in the end we bought some off white/ yellow grout and filled the holes where all the rails were. I think even if we did find tiles to replace the ones with drill holes, it would have been a very tricky job removing only a couple here and there without damaging the surrounding tiles!
We also had two tiles missing that needed to be replaced, but like I said, I just couldn't find these tiles anywhere. Then I had a light bulb moment... I discovered this cute vintage bathroom cupboard at a local retro store (My Modern Nest) which became the solution to our problem.
We bought some light yellow vintage tiles from a salvage yard, removed two original tiles where this cupboard was going to go, replaced them with the yellow tiles, and then used the original tiles to fill the spots that were missing tiles. (Make sense? A big mouthful I know, but hopefully you get what I am trying to say!) The cool thing is, you would never know that we have tiles that don't exactly match under this cupboard.
To see the renovation in progress and more photos click here >


1 comments
Oh, lovely. So good that you kept all of the original features. Love those windows!
ReplyDelete