
Denis's Studio Reno - Part 1
April 19, 2013 |
| Visual Storyboard - the overall look and feel of the space! |
When we bought our home, it was always in the plan to convert the garage, so 2 years on it is exciting to see the transformation taking place. I have to take a moment to thank Denis. He patiently worked with me renovating our kitchen, laundry, den, bathroom and bedroom first before starting this - which made me a very happy and content lady! :)
So while Denis is doing the hard stuff, I have been starting to design the interior. Trying to incorporate touches of a 1950s beach side theme to suit the studio location, working within a strict budget and utilising our existing furniture, second-hand and hard rubbish finds!
I'm totally in love with the vintage inspired beachy fabric from Mini Moderns. I have a couple of teak chairs to cover, so better get onto that soon!
 |
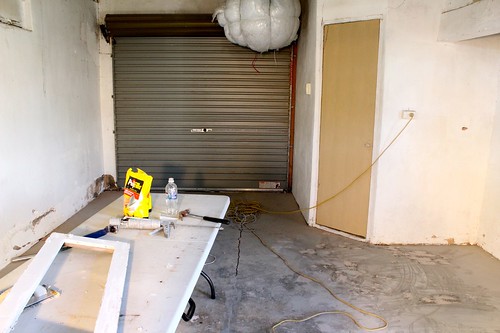
| Mmmmm, the state of the garage before we started! |
 |
| Our cute shed found on ebay |
 |
| Elevation 1 - gorgeous original windows |
 |
| Elevation 2 - the front of the garage |
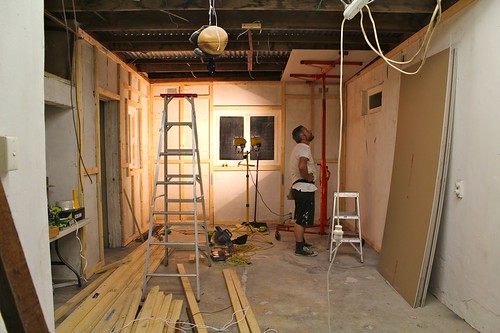 |
| Walls framed and ceiling going up. Mmmm the wall is not straight! |
 |
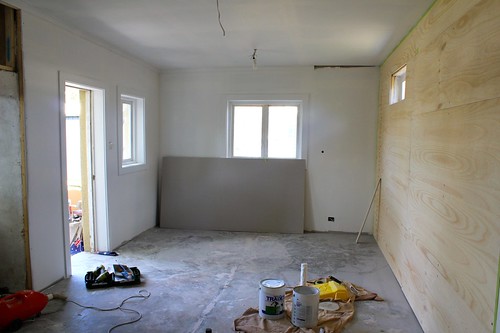
| Ceiling and gib complete, planning the ply feature wall. |
 |
| Ply up and undercoat complete - looking mighty fine! |
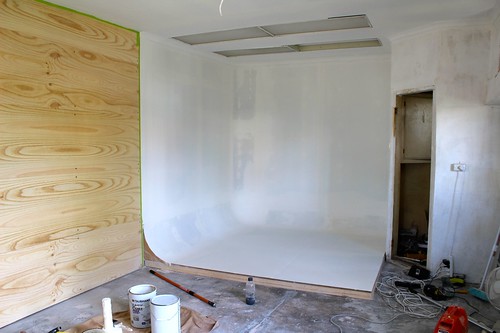 |
| The amazing seamless wall (to be used as a photo backdrop). |
And check out the amazing photo backdrop Denis built. It's a seamless white wall (no sharp corners) that will be used for product and fashion shots, and also video interviews.
Come back again soon to see the finished product. Click here to check out more progress photos >
Toodle-pip!


2 comments
AMAZING! You guys work so hard to create so much, love your life, and that you share it. Beautiful work, looking forward to seeing the finished project.
ReplyDeleteThis looks amazing! Love your site, thank you for sharing your life. I found your site when looking at facebook - I follow a few similar sites but they are all in the USA which is a nuisance when they mention places to go for good finds. I am thrilled to find someone in Adelaide (where I live) to "follow" (figuratively you understand).
ReplyDelete