

 |
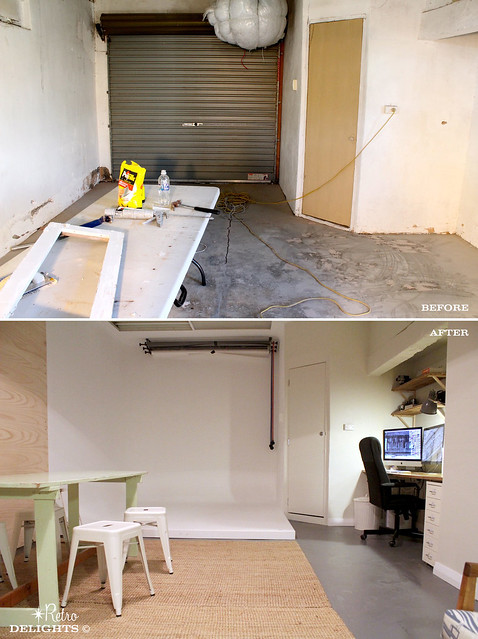
| Home made infinity wall! |
I am so amazed with Denis's stamina, fitting this in and around his photography work, as well as general life stuff. But this is his reward, an amazing new space to share with his customers.
The white wall you can see in the corner of the photo above is a special seamless wall. Denis cleverly constructed this area - the perfect backdrop for portrait and product photography.
 |
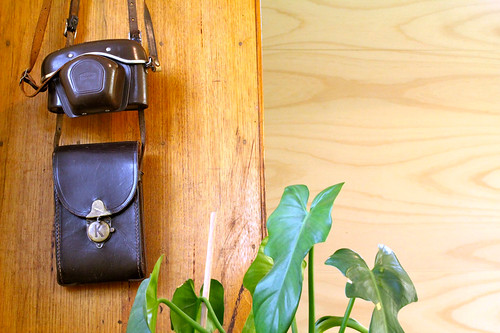
| All decked out with his fave collection of retro camera gear! |
I am happy with the results... The design and layout for this space has worked out well, and it has me thinking about my own studio and what I am going to do to it!
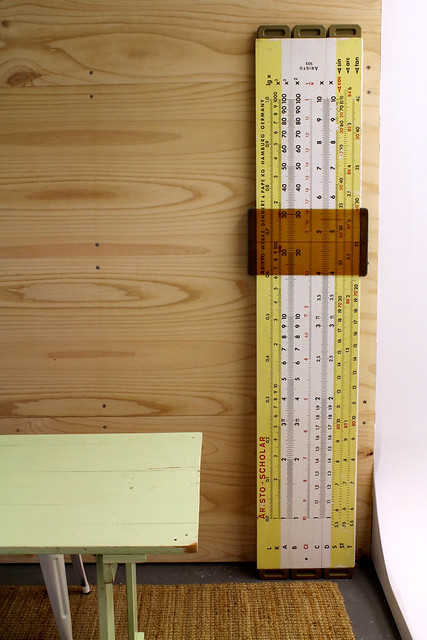
We already owned the furniture, apart from the white industrial 'Tolix' stools. A great solution for a space that must be flexible - we can stack the stools and also fold down the trestle table if we need a bigger area to work in.
Some retro delights around the studio...
 |
| The original Instagram? |
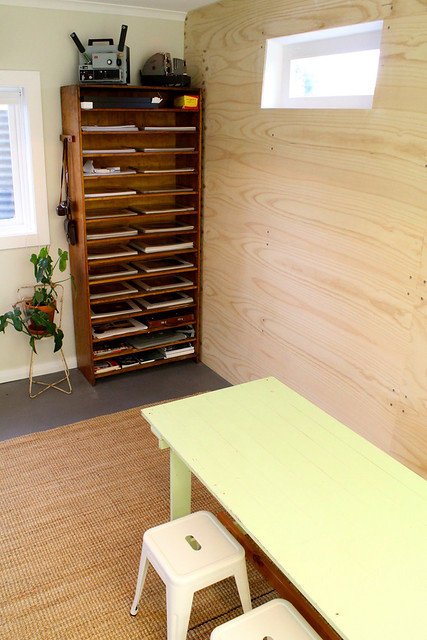 |
| Wooden shelving, an amazing score off Gumtree for $40! |
Ok, now a quick run down of the nuts and bolts...
Toodle-pip! |

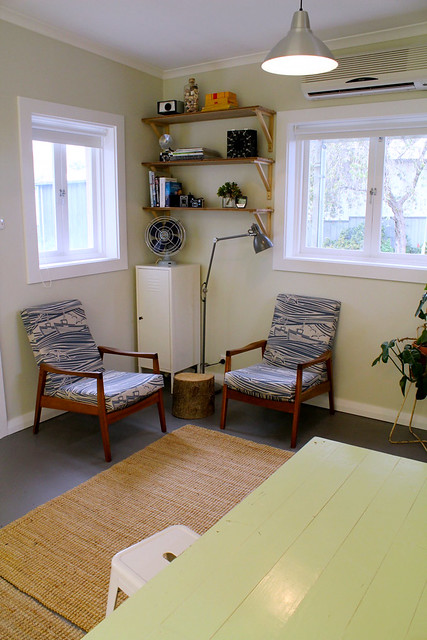

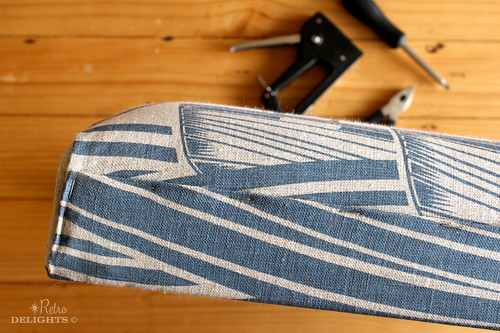
These would have to be my favourite chairs! I bought them about 6 years ago in Auckland for $12 a piece. The brand is AIREST - 'The Furniture with a Future'.
They are definitely keepers, not only because they are sooooo comfy, they are also the easiest design to recover for a completely different look. So when we moved back to Australia they had to come for the ride!
The first time I recovered the chairs I used IKEA fabric, and it was my first ever attempt at recovering anything and I was pretty impressed with the transformation. This time my friend Moyra offered to help me recover them with my new Mini Moderns fabric from the UK. I totally welcomed the offer with open arms, as I found the whole cutting the fabric thing quite stressful... I didn't want to make any errors as it wasn't a case of just popping back to IKEA for more.
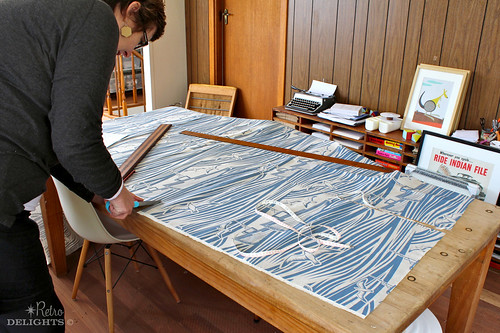 |
| Moyra carefully measuring and cutting our 3 meters of Mini Moderns 'Whitby' Linen. |
We each sewed a back cushion cover, and then while I was busy doing the staple closure, Moyra set forth and finished the seat cushion covers for me.
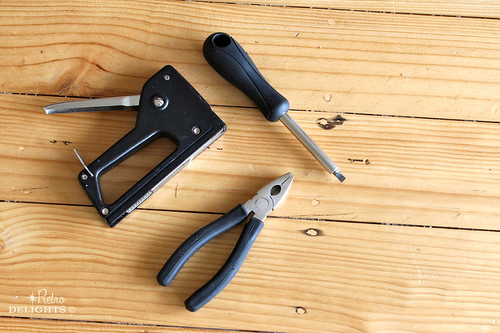 |
| Tools - flat head screwdriver, pliers, and a staple gun. |
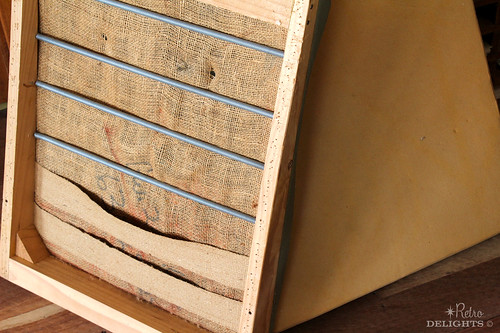 |
| The seat back... all old staples removed. |
 |
| I used the staple gun to close the cover at the base of the back cushion where it is not seen. |
 |
| Sewing compete, now time to focus on the frames. |
 |
| Wax and grime build up. |
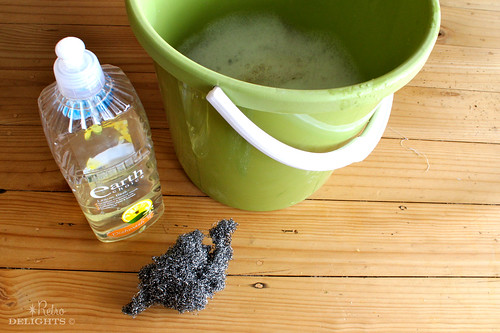 |
| Warm soapy water does the trick. |
 |
| A light buff with a scourer along the grain for stubborn spots. |
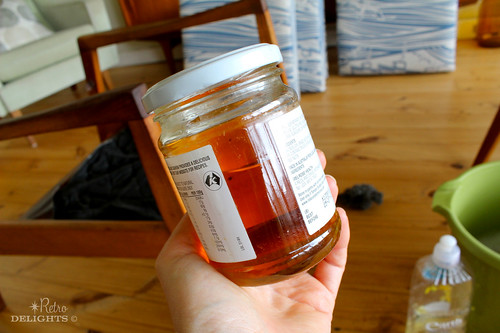 |
| A drink of Danish oil. |
 |
| The result - the beautiful rich teak now revealed! |
Alternatively, if the frame is really dry and rough, then I would lightly sand the frame with a fine sand paper before applying the oil.
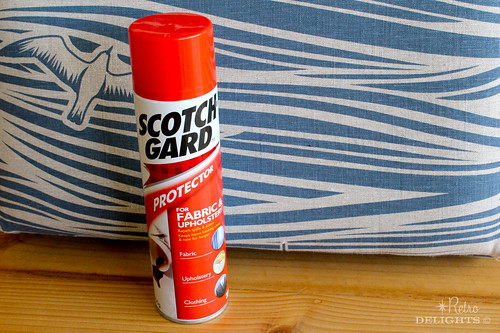 |
| Scotch Gard from the supermarket to protect the fabric. |
 |
| The re-assembled chair ready for it's new home. Love it! |
So I ended up doing 2 x light coats today, waiting 1.5 hours in between coats. I recommend doing this outside in an open space so you don't inhale the fumes.
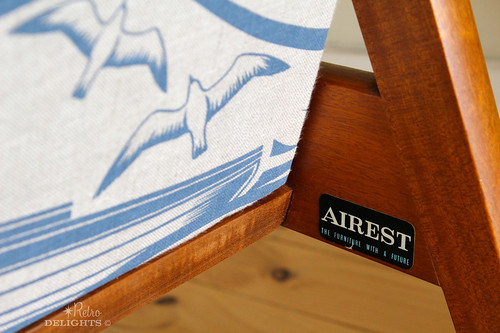 |
| The original chair brand - AIREST. |
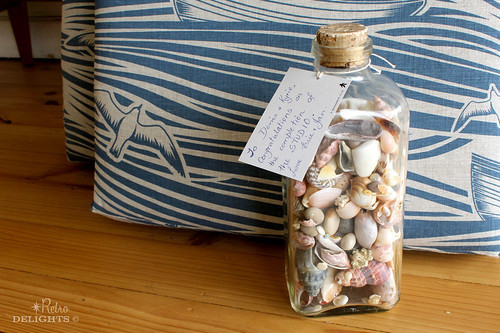 |
| A life long shell collection. |
When she gave it to us, I looked at it and thought how amazing it is to think that these shells were individually picked up and carefully carried home and stored in this bottle by my Mum who is now 75 years old. Lot's of memories in this jar - and I am sure if I asked her, she probably knows the story behind most of these shells! I also recognised some of the shells that I collected when I was a kid on our annual West Beach holiday. I would often sit and stare at this jar in wonder, looking at the colours, shapes and their beauty.
It is Mum's contribution to the studio, which is very near completion (more about that in another blog post). Oh how special and cute!
Toodle-pip!
 |
| Visual Storyboard - the overall look and feel of the space! |
When we bought our home, it was always in the plan to convert the garage, so 2 years on it is exciting to see the transformation taking place. I have to take a moment to thank Denis. He patiently worked with me renovating our kitchen, laundry, den, bathroom and bedroom first before starting this - which made me a very happy and content lady! :)
So while Denis is doing the hard stuff, I have been starting to design the interior. Trying to incorporate touches of a 1950s beach side theme to suit the studio location, working within a strict budget and utilising our existing furniture, second-hand and hard rubbish finds!
I'm totally in love with the vintage inspired beachy fabric from Mini Moderns. I have a couple of teak chairs to cover, so better get onto that soon!
 |
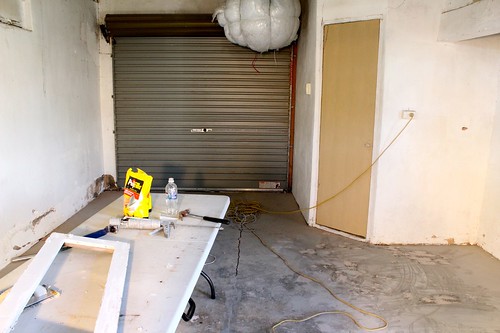
| Mmmmm, the state of the garage before we started! |
 |
| Our cute shed found on ebay |
 |
| Elevation 1 - gorgeous original windows |
 |
| Elevation 2 - the front of the garage |
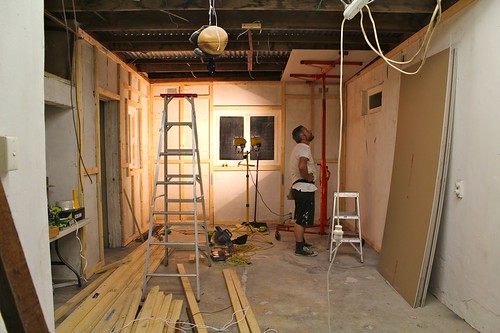 |
| Walls framed and ceiling going up. Mmmm the wall is not straight! |
 |
| Ceiling and gib complete, planning the ply feature wall. |
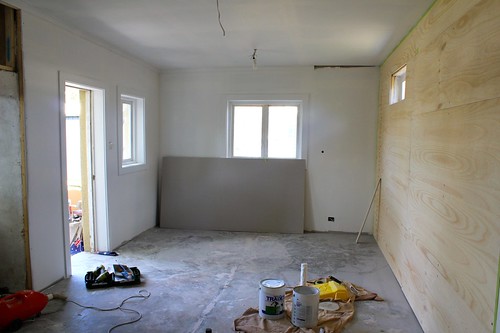 |
| Ply up and undercoat complete - looking mighty fine! |
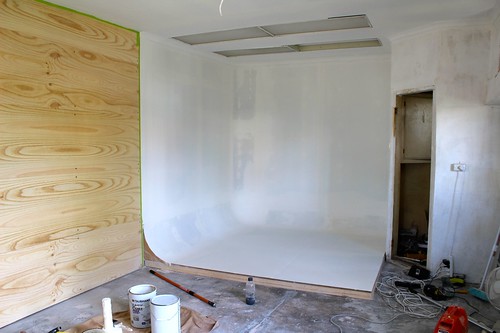 |
| The amazing seamless wall (to be used as a photo backdrop). |
And check out the amazing photo backdrop Denis built. It's a seamless white wall (no sharp corners) that will be used for product and fashion shots, and also video interviews.
Come back again soon to see the finished product. Click here to check out more progress photos >
Toodle-pip!
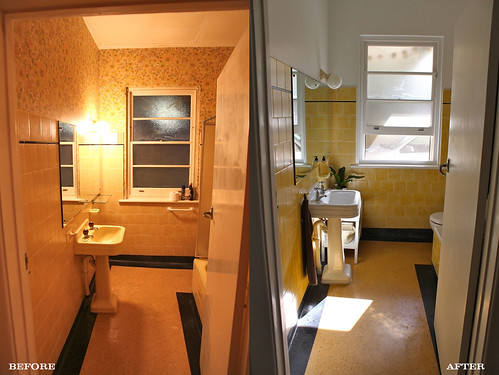 |
| We kept the original light fitting. The walls look so much cleaner with the wallpaper removed. |
When we bought our 1950s home, I was so pleased to find that the original bathroom was still intact. I love 1950s pastel bathrooms, and even though I would have preferred 'mint green', yellow was much better than pink! (I am simply not a pink girl!)
So considering the original tiles, pedestal basin, big bath and terrazzo floor were still in great condition, it was an obvious decision to retain all of these features. The classic thing, all the elements that needed replacing were the 1970's updates... toilet, taps (yuk), shower screen and the tired old 70s wallpaper.
 |
| Love love love the original floor! |
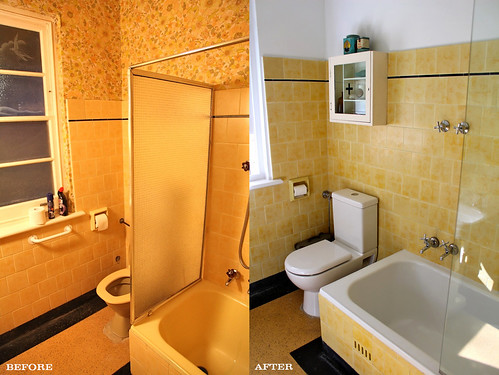 |
| Ahhhhh, a nice new toilet that doesn't leak! |
Where the original 1950s toilet was positioned there was an area of concrete exposed at the base of the toilet. I hunted around for a toilet that had the deepest base and this was the best I could come up with. A bit of the concrete can still be seen, but hey, it all helps to add character!
 |
| The original shower configuration simply did not work for us. |
Removing the 70s shower screen made the world of difference to this space. The original shower configuration was quite odd, with the shower head up one end of the bath and facing outwards there wasn't a lot of room to wash. The other end of the bath was kind of a void, so we decided to have the shower head shifted around to the other end making much better use of the space! A simple glass screen mounted to the wall above the bath finished it all off.
 |
| Cute original feature window etching, seagulls and waves. |
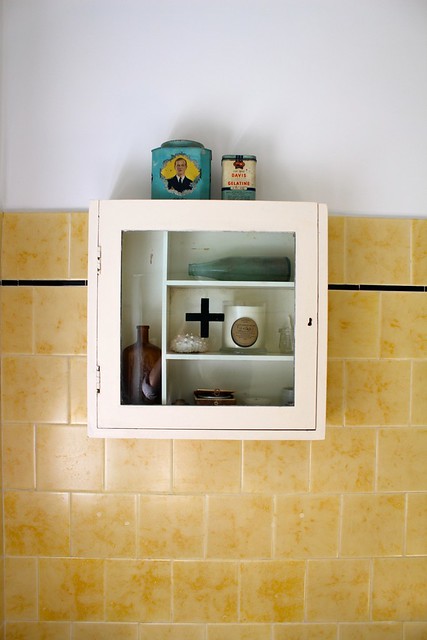 |
| Bathroom Cabinet from My Modern Nest |
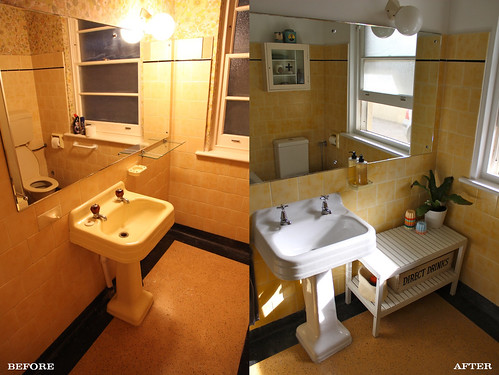
We had quite a few hand rails to remove that left holes in the tiles (they were put up for the previous owner - an elderly gentleman). I was hoping I would find some matching tiles from a salvage yard to replace them, but no joy. So in the end we bought some off white/ yellow grout and filled the holes where all the rails were. I think even if we did find tiles to replace the ones with drill holes, it would have been a very tricky job removing only a couple here and there without damaging the surrounding tiles!
We also had two tiles missing that needed to be replaced, but like I said, I just couldn't find these tiles anywhere. Then I had a light bulb moment... I discovered this cute vintage bathroom cupboard at a local retro store (My Modern Nest) which became the solution to our problem.
We bought some light yellow vintage tiles from a salvage yard, removed two original tiles where this cupboard was going to go, replaced them with the yellow tiles, and then used the original tiles to fill the spots that were missing tiles. (Make sense? A big mouthful I know, but hopefully you get what I am trying to say!) The cool thing is, you would never know that we have tiles that don't exactly match under this cupboard.
To see the renovation in progress and more photos click here >


